
You’ve just finished culling 800 shots from a client shoot. Now comes the part nobody talks about in tutorials: tagging every single image with your copyright, your studio contact, the client name, the shoot date, the usage rights. Field by field. Image by image.
If you’ve ever copy-pasted your copyright notice into a metadata panel more times than you can count, Metadata Profiles are for you.
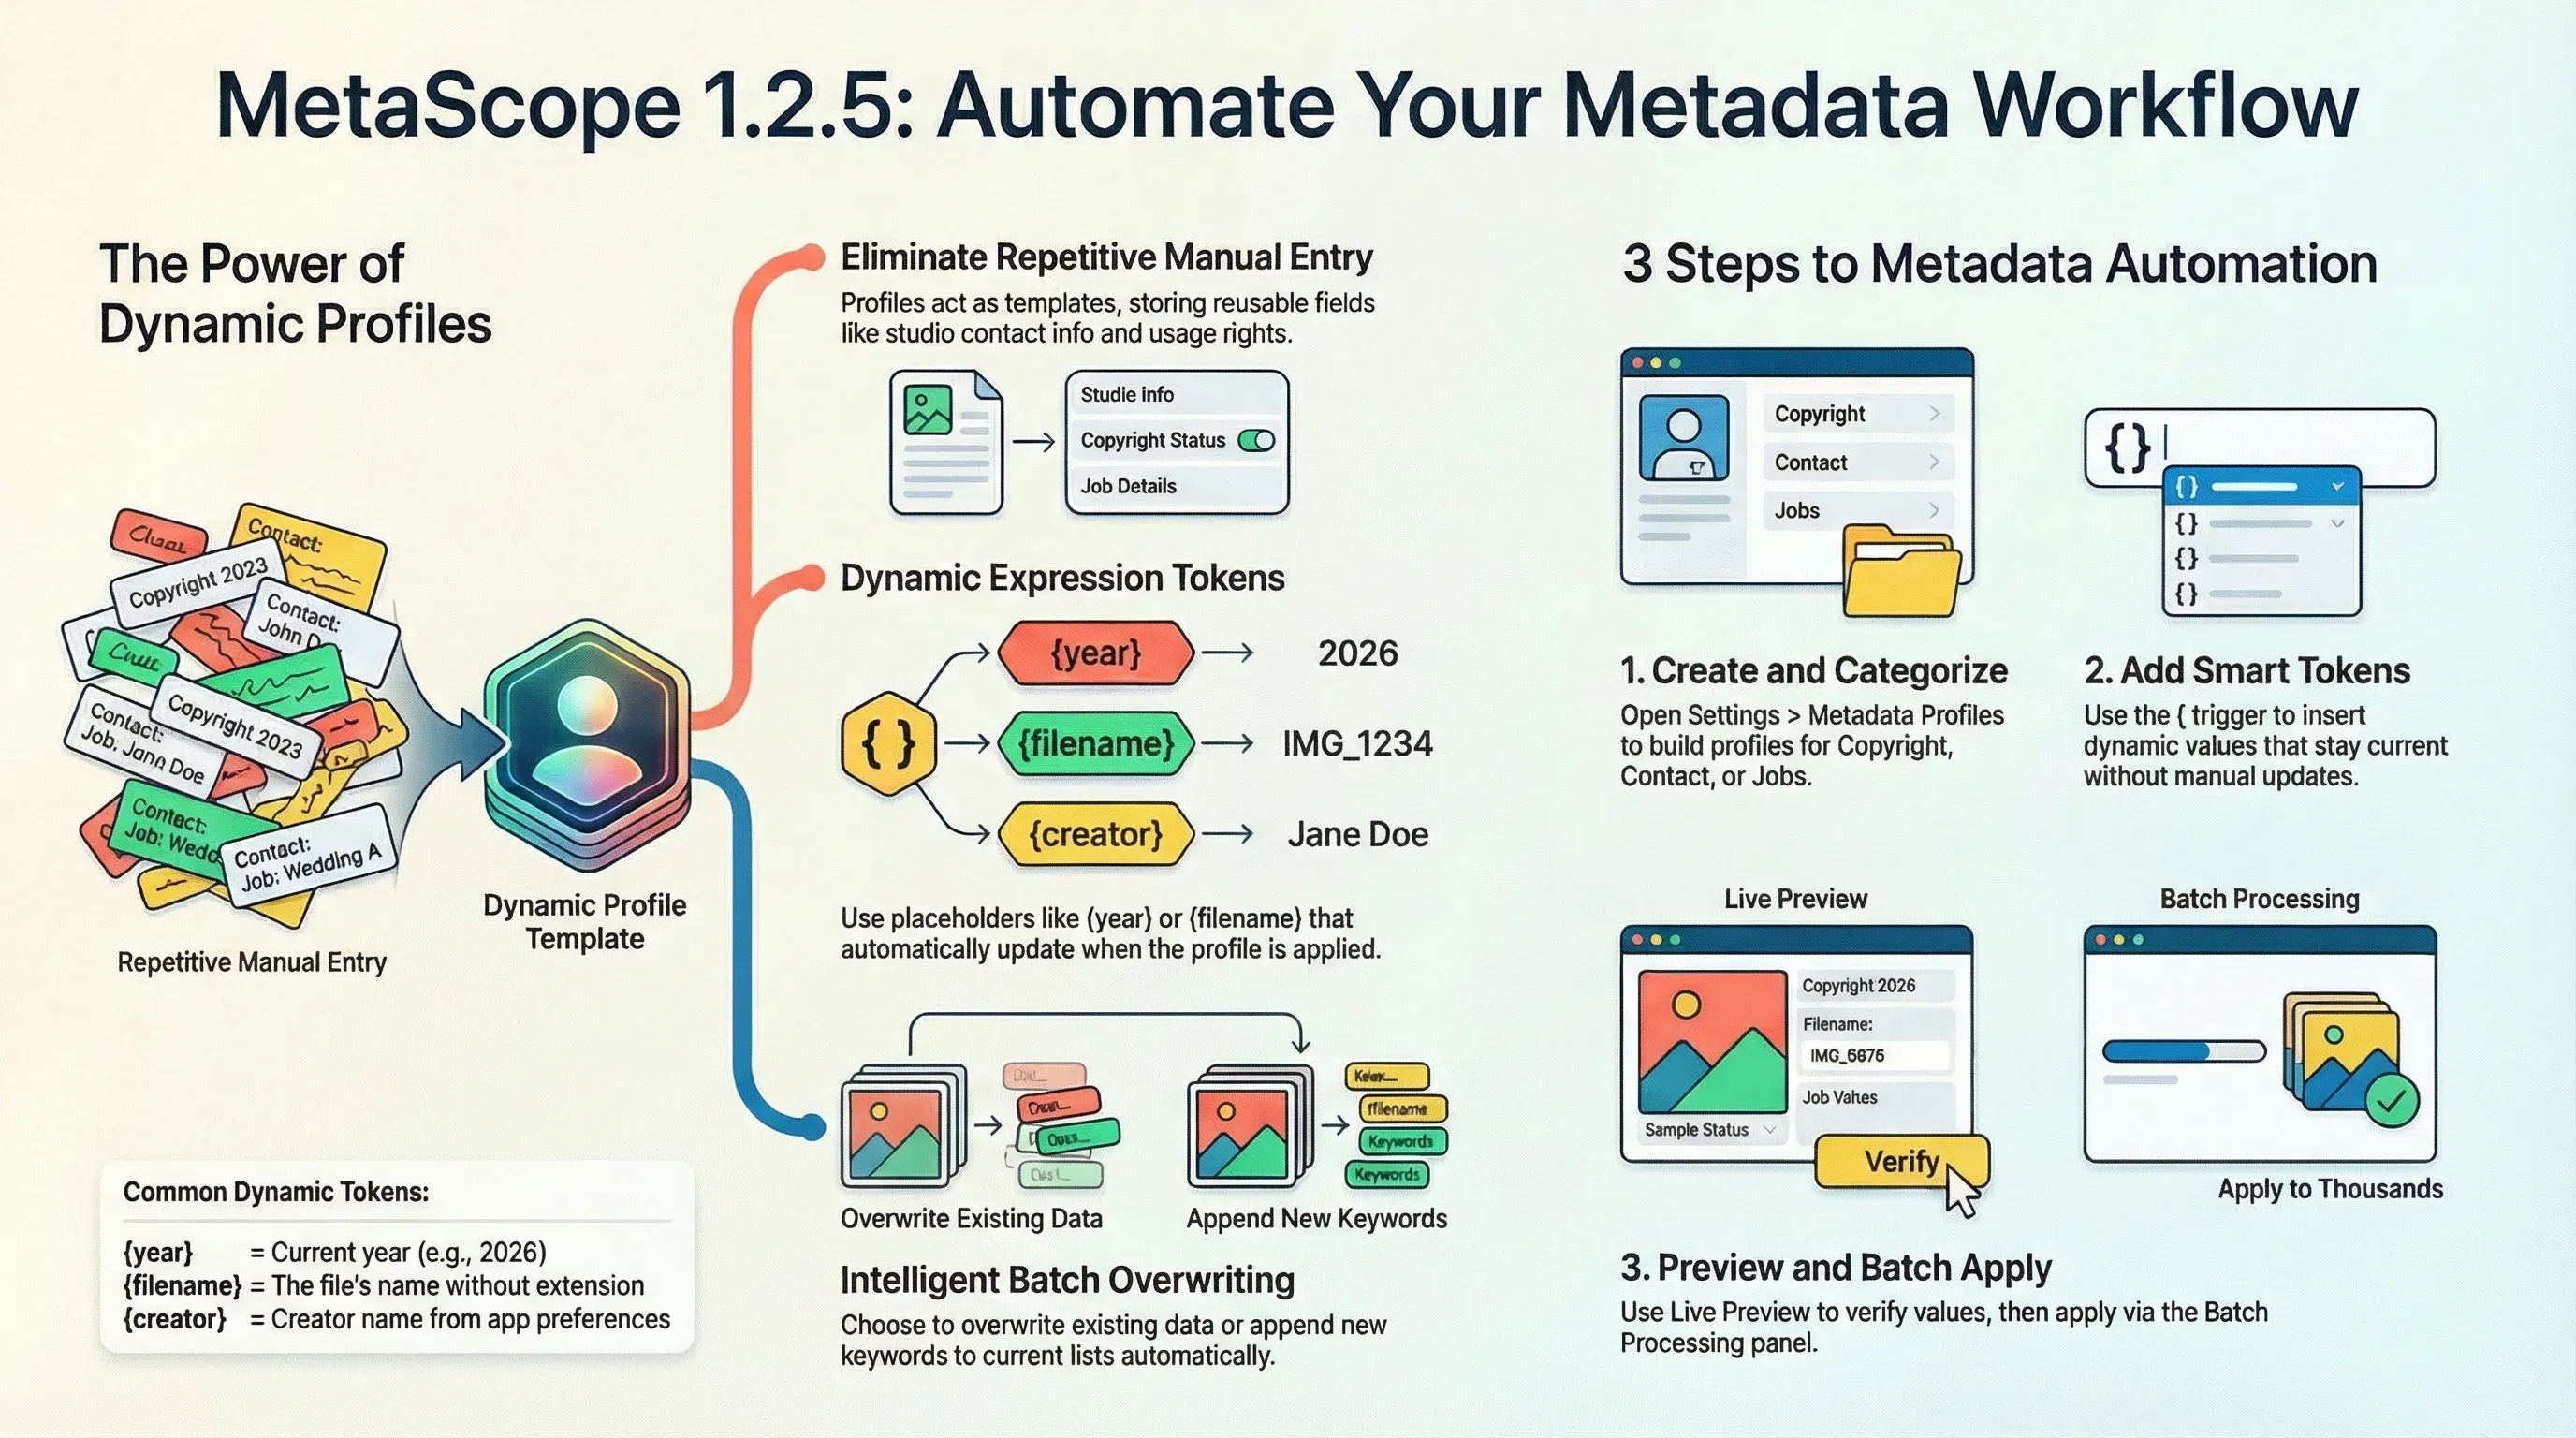
The Problem: Metadata That Repeats Itself
Metadata standards like IPTC and XMP exist for a reason — they ensure your images carry the information that stock agencies, editorial clients, and archiving systems need. Copyright holder. Creator contact. Rights usage. License terms.
The trouble is that most of this information doesn’t change between shoots. Your name is your name. Your website is your website. Your copyright year changes once a year. Yet every time you import a new batch, you’re starting from scratch — or hoping yesterday’s paste buffer is still loaded.
The real cost isn’t the five minutes you spend on each batch. It’s the images that slip through without any metadata at all because the process was too tedious to bother with.
The Solution: Metadata Profiles
MetaScope 1.2.5 introduces Metadata Profiles: reusable sets of field-to-value mappings that you define once and apply to any number of files in a single action.
Think of a profile as a template. You define which fields it populates and what values they contain. Then whenever you need those fields stamped on a batch of images, you select the files, pick the profile, and it’s done.
Profile Management
Profiles live in Settings > Metadata Profiles, organized into categories that match how you actually think about your metadata:
- Copyright & Rights — Your name, studio, copyright year, usage license
- Contact Information — Email, website, phone, address for your embedded creator contact
- Job & Assignment — Client name, project code, shoot location
Creating a profile is straightforward: name it, choose a category, and add the fields you want it to populate. Each profile can cover as many or as few fields as you need. A “Basic Copyright” profile might have three fields. A “Full Editorial Package” might have fifteen.
Profiles can be duplicated to create variations — a “Commercial License” profile and a “Editorial Only” profile can share most fields but differ on rights usage text.
Expression Tokens: Dynamic Values That Resolve at Apply-Time
Static values cover most cases, but not all. Your copyright year needs to match the actual year. A shoot-specific profile might need today’s date. The filename might need to appear in a description field.
Profile values support expression tokens — placeholders that resolve to real values when the profile is applied:
| Token | Resolves To |
|---|---|
{year} | Current year (e.g., 2026) |
{month} | Current month (2-digit, e.g., 02) |
{date:yyyy-MM-dd} | Current date in any format you specify |
{filename} | The file’s name without extension |
{creator} | The creator name from your app preferences |
So your copyright field might read © {year} Jane Smith Photography and resolve to © 2026 Jane Smith Photography every time it’s applied — without you having to update the profile each January.
Tokens are discoverable: type { in any value field and an autocomplete popover shows all available tokens with descriptions.
Live Preview
The profile editor shows you exactly what a token-containing value will resolve to before you apply it anywhere. Type a value with tokens, and the preview updates in real time beneath the field. No surprises when you apply to 400 images.
Application Options
When applying a profile, two options control how it interacts with existing metadata:
Overwrite Existing determines what happens when a file already has a value in a field the profile covers. With this on, the profile value wins. With it off, existing values are preserved — useful when you want to fill gaps without touching fields someone else has already populated.
Append to Lists changes behavior for bag and sequence fields like keywords. Instead of replacing your existing keywords with the profile’s keyword list, it adds the profile’s keywords to whatever’s already there. Duplicate keywords are automatically filtered out, so you won’t end up with “nature, nature, nature” in your keyword field.
Batch Processing
Profiles integrate with MetaScope’s Batch Processing panel. The Apply Profile tab lets you select a profile, set the application options, and apply to all selected files — with a progress indicator so you can see how a large batch is moving through.
Import and Export
Profiles are stored as .metaprofile files — human-readable JSON you can back up, version-control, and share. If your studio has multiple photographers using MetaScope, you can define the studio’s standard profiles once, export them, and import them on every machine. Everyone stamps images with the same fields in the same format.
Getting Started
- Open Settings > Metadata Profiles — This is where you create and manage all your profiles.
- Create your first profile — Click the + button, name it (e.g., “My Copyright”), choose “Copyright & Rights”, and add the fields you apply most often.
- Add tokens where appropriate — Use
{year}in your copyright field so it stays current automatically. - Select some files and apply — In the main browser, select a batch of images, open the Batch Processing panel, go to the Apply Profile tab, pick your profile, and click Apply.
Pro Tips
- Keep profiles focused — A “Copyright Only” profile and a separate “Contact Information” profile are more flexible than one giant profile. You can apply them independently or stack them in sequence.
- Use the preview before committing — The live preview in the editor shows you exactly what will be written. Check it before applying to anything important.
- Set Append to Lists for keyword profiles — If you create a profile specifically for adding genre keywords (like “Landscape Photography” or “Wedding”), turn on Append to Lists so it adds to rather than replaces any existing keywords on your files.
- Export your profiles as backups — After setting up profiles you rely on, export them to a folder in your project or studio drive. Reinstalling the app or switching machines won’t cost you that setup work.
Metadata Profiles are part of the MetaScope Pro subscription. Update from the Mac App Store or open MetaScope and check for updates.
Learn more about MetaScope, the professional metadata editor for macOS.